版本说明
- 系统版本为CentOS 7
- fastdfs版本选用的5.05
注意:系统版本不一样,相关命令会有差异
下载准备

选用fastdfsz的版本是5.05,区别于以往版本,这个版本将公共的一些函数等单独封装成了libfastcommon这个jar包,所以在安装fastdfs之前,我们必须先安装libfastcommon。
安装libfastcommon
1 | cd /opt |
缺少依赖包,出现如下错误: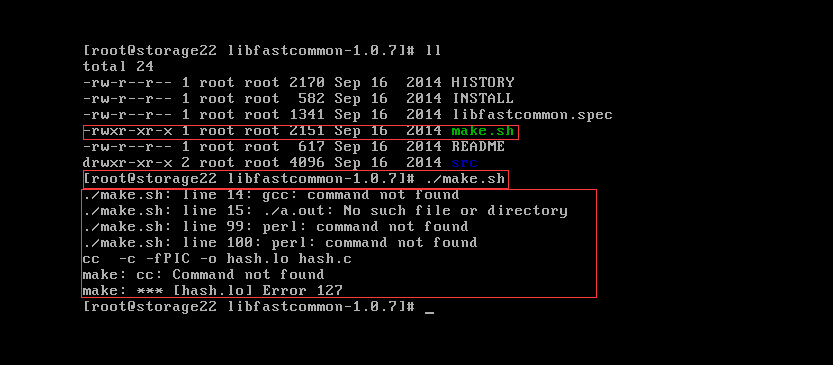
安装依赖包
1 | yum -y install gcc perl |
再次安装libcofastcommon
1 | cd ~/opt/libfastcommon-master && ./make.sh && ./make.sh install |
安装fastdfs
1 | wget https://github.com/happyfish100/fastdfs/archive/V5.05.tar.gz |
安装完成后,所有可执行文件在目录/usr/bin下,以fdfs_开头:
1 | ls /usr/bin/fdfs_* |
配置文件在目录/etc/fdfs下:
1 | ls /etc/fdfs |
配置Tracker跟踪器
开放tracker监听端口访问
1 | firewall-cmd --zone=public --add-port=22122/tcp --permanent |
修改Tracker配置文件
1 | mkdir -p /home/fastdfs |
设置Tracker便捷管理命令
1 | bash -c 'cat > /usr/lib/systemd/system/fdfs_trackerd.service << EOF |
启动tracker
1 | systemctl start fdfs_trackerd.service |
查看启动tracker日志,确认tracker是否启动成功
1 | cat /home/fastdfs/logs/trackerd.log |
配置Storage存储节点
开放Storage监听端口访问
1 | firewall-cmd --zone=public --add-port=23000/tcp --permanent |
修改Storage配置文件
1 | mkdir -p /home/fastdfs |
设置Storage便捷管理命令
1 | bash -c 'cat > /usr/lib/systemd/system/fdfs_storaged.service << EOF |
启动Storage
1 | systemctl start fdfs_storaged.service |
查看启动Storage日志,确认Storage是否启动成功
1 | cat /home/fastdfs/logs/storaged.log |
配置Client客户端
这里搭建的是测试环境,所以Client与Tracker、Storage都安装在同一台机器上
1 | mkdir -p /home/fastdfs |
FastDFS测试
上传测试
1 | /usr/bin/fdfs_upload_file /etc/fdfs/client.conf /opt/Tulips.jpg |

查看文件信息
1 | /usr/bin/fdfs_file_info /etc/fdfs/client.conf group1/M00/00/00/wKgAUFXByOmAVJ5kAABzaUPC-FA256.jpg |

下载测试
1 | /usr/bin/fdfs_download_file /etc/fdfs/client.conf group1/M00/00/00/wKgAUFXByOmAVJ5kAABzaUPC-FA256.jpg downtest.jpg |
重启命令
1 | /usr/bin/fdfs_trackerd /etc/fdfs/tracker.conf restart |
Nginx安装
安装缺少的依赖包
1 | yum install gcc-c++ |
解压nginx-1.7.12.tar.gz,编译安装Nginx
1 | tar -zxvf nginx-1.7.12.tar.gz |
安装完最后会列出配置信息
1 | Configuration summary |
防火墙开发HTTP服务
1 | firewall-cmd --permanent --zone=public --add-service=http |
创建nginx用户
1 | useradd nginx |
启动nginx
1 | /opt/nginx/sbin/nginx |
查看端口
1 | netstat -tnlp|grep nginx |

浏览器访问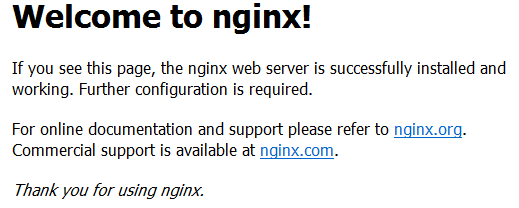
其他命令
Nginx -s stop 快速关闭Nginx,可能不保存相关信息,并迅速终止web服务。(quick exit)
Nginx -s quit 平稳关闭Nginx,保存相关信息,有安排的结束web服务。(graceful exit)
Nginx -s reload 因改变了Nginx相关配置,需要重新加载配置而重载。(changing configuration,start a new worker,quitting an old worker gracefully.)
Nginx -s reopen 重新打开日志文件。(reopenging log files)
fastdfs-nginx-module 配置
1 | cp /opt/fastdfs-nginx-module-master/src/mod_fastdfs.conf /etc/fdfs/ |
修改
1 | base_path=/home/fastdfs |
Storage服务器Nginx配置
/usr/local/nginx/conf/nginx.conf 上server{} 里添加
1 | location ~/group1/M00 { |
Nginx重新加载配置
1 | /opt/nginx/sbin/nginx -s reload |
问题总结
1、当上传文件时发现总是失败返回response status 2 !=0,查看storaged.log发现如下错误: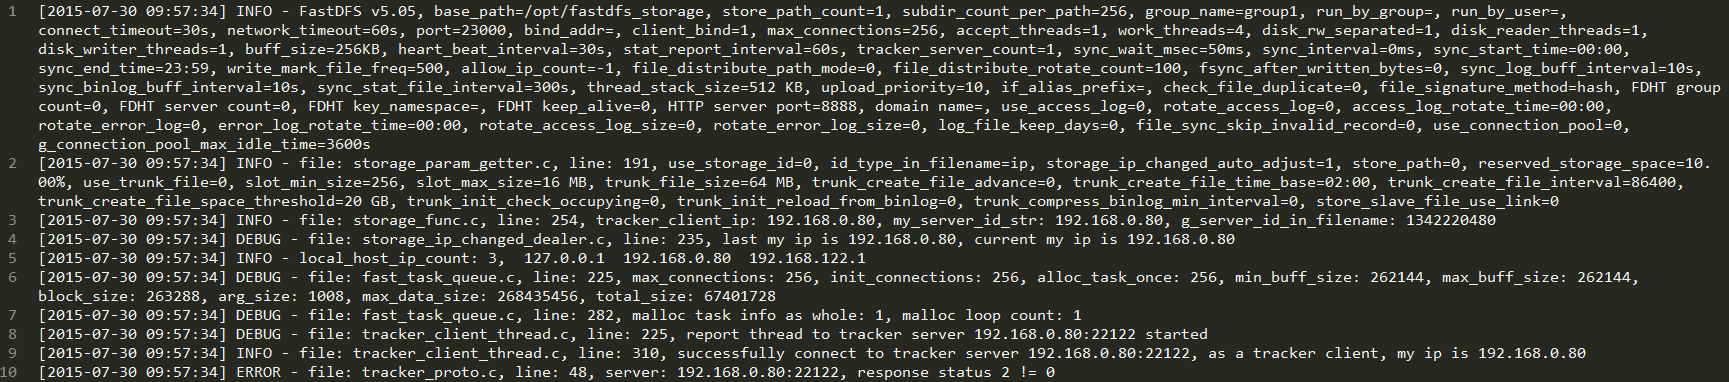
用fdfs_monitor命令查看storage节点状态
1 | /usr/bin/fdfs_monitor /etc/fdfs/storage.conf |
发现两个离线状态的无效storage节点,用以下命令删除之
1 | fdfs_monitor /etc/fdfs/client.conf delete group1 192.168.0.80 |
重启tracker及storage服务,问题解决。
未深入分析原因。
2、访问图片出现400错误
查看日志/home/fastdfs/logs/mod_fastdfs.log
1 | [2015-07-30 16:24:13] ERROR - file: ../common/fdfs_global.c, line: 52, the format of filename "group1/M00/00/00/wKgAUFW53n-AZ5X2AABzaUPC-FA370.jpg" is invalid |
/opt/nginx/logs/error.log
1 | 192.168.0.170 - - [30/Jul/2015:16:13:06 +0800] "GET /group1/M00/00/00/wKgAUFW5w4iAViuiAABVNkmGVeE577.xml HTTP/1.1" 400 575 "-" "Mozilla/5.0 (Windows NT 6.1; WOW64) AppleWebKit/537.36 (KHTML, like Gecko) Chrome/43.0.2357.124 Safari/537.36" |
后查明是因为url中带了group名字,FastDFS是默认关闭的。
1 | url_have_group_name=false |
将以上参数改为true即可
1 | sed 's:url_have_group_name.*:url_have_group_name=true:g' /etc/fdfs/mod_fastdfs.conf |